Webpack Configuration step by step - Development to Production
October 15, 2019 • 23 min read


Learn how to configure webpack from Development to Production with some practical best pratices and optimization.
Hello World!
This is my first ever article, and we're gonna learn how to configure webpack step by step for JavaScript development. This guide, we not only cover configure webpack for development, but we'll also cover how to configure webpack for Production because, for Production, it is a best practice to optimizing all our code and assets.
TL;DR
You can see the full config and code in this repo.
Getting Started
First, we need to create our webpack project. Let's create a new folder, and I'll pick a folder name webpack-boilerplate. Inside that folder, initialize our project with npm init or yarn init. Once we done, inside our project directory will have package.json.
After that, we need to create a config and src folder. Inside a config folder, create webpack.config.js file. Inside src folder create two files, index.html and index.js, it's the entry point of our project.
Now, the structure of our project will look like below:
|-- config
    |-- webpack.config.js
|-- src
    |-- index.html
    |-- index.js
|-- package.json
Install Webpack
There are 3 packages that we need to install for the webpack to work. First, webpack, the main or core functionality of webpack. Second, webpack-cli, so we can use webpack from our command line, and the third is webpack-dev-server, it's a development server that provides us with a simple web server and the ability to use live reloading.
Let's install 3 of those:
# If you're using yarn
yarn add --dev webpack webpack-cli webpack-dev-server

# If you're using npm
npm install --save-dev webpack webpack-cli webpack-dev-server
At this point, we can already use webpack, because starting webpack version 4, it doesn't require any configuration. Let's test it and fill our src/index.js with code below:
// src/index.js
function greet(name) {
  return new Promise((resolve, reject) => {
    setTimeout(() => {
      resolve(`Hello ${name}!`);
    }, 1000);
  });
}

greet('John Doe').then((response) => {
  console.log(response); // -> "Hello John Doe!"
});
Now open up our package.json, and add scripts to run the webpack:
// package.json
{
  // other items
  "scripts": {
    "compile": "webpack"
  }
}
Let's run it on our terminal:
# If you're using yarn
yarn compile

# If you're using npm
npm run compile
With this script, webpack will automatically take our script at src/index.js as the entry point, and it will generate dist/main.js as the output code. Awesome right?
But, we want more than this, for example, we want to use a development server to live reload so we can get instant feedback on the browser while update our code, use the latest JS syntax, use CSS or CSS Pre-Processor like SASS, automatically add vendor prefix for our CSS, and optimize our code for production. But how?
That's where webpack configuration comes in handy! Let's use it in our project to setup a development server and then setup our project to use the latest JS features (ES6 and beyond).
ES6 and Beyond
To use the latest JS features today, we're gonna need Babel. But, what is Babel? Babel is a tool that helps us to compile our code (newest JS features) into a backwards compatible version of JS so that older browser can understand. Babel not only compiles our code, but it will also Polyfill features that are missing in older browser using core-js library.
Let's add Babel to our project:
# If you're using yarn
yarn add --dev @babel/core @babel/preset-env babel-loader
yarn add core-js

# If you're using npm
npm install --save-dev @babel/core @babel/preset-env babel-loader
npm install --save core-js
Before we add configuration to using Babel, first, we need to define what browser that we want to support using browserlist.
Let's add the list of browser that we want to support in our package.json:
// package.json
// In this example, we are using this browserlist
// Which support 91% global coverage
// Docs: https://github.com/browserslist/browserslist
{
  // other items
  "scripts": {
    "compile": "webpack"
  },
  "browserslist": [">0.2%", "not dead", "not op_mini all"]}
Now comes the fun part, where we will use the webpack configuration to use the development server and Babel that we just installed.
Open up our config/webpack.config.js and add code below:
// config/webpack.config.js
const path = require('path');

/**
 * process.cwd() will return a path to our active project directory
 * For example, on windows will look like:
 * c:\Users\username\project\webpack-boilerplate
 * On Mac:
 * /Users/username/project/webpack-boilerplate
 */
const ROOT_DIRECTORY = process.cwd();

module.exports = {
  /**
   * Define webpack mode
   * Which webpack will set NODE_ENV to 'development'
   * Docs: https://webpack.js.org/configuration/mode/
   */
  mode: 'development',
  /**
   * Here, we tell webpack where the entry point of our code
   * If you only have a single entry point you can also do it like below
   * entry: path.resolve(ROOT_DIRECTORY, 'src/index.js'),
   * Docs: https://webpack.js.org/configuration/entry-context/
   */
  entry: {
    main: path.resolve(ROOT_DIRECTORY, 'src/index.js'),
  },
  /**
   * Tell webpack where it should output
   * our bundles, assets, and anything else
   * In this example, it will be inside /build folder
   * Docs: https://webpack.js.org/configuration/output/
   */
  output: {
    path: path.resolve(ROOT_DIRECTORY, 'build'),
    filename: '[name].bundle.js',
    chunkFilename: '[name].chunk.js',
  },
  /**
   * This devServer option is our development server that get picked up by webpack-dev-server
   * Docs: https://webpack.js.org/configuration/dev-server/
   */
  devServer: {
    // Serves everything from our build folder which is our output folder
    contentBase: path.resolve(ROOT_DIRECTORY, 'build'),
    // Enable gzip compression
    compress: true,
    // Which port we want to use, in this case, we use port 3000
    port: 3000,
    // This will show a full-screen overlay in the browser when there are compiler errors
    overlay: true,
  },
  /**
   * Generate source-maps to make it easier to track down errors and warnings
   * In this example, we're using cheap-module-eval-source-map (recommend by webpack)
   * Docs: https://webpack.js.org/configuration/devtool/
   */
  devtool: 'cheap-module-eval-source-map',
  module: {
    rules: [
      /**
       * Here we kinda tell webpack if it comes across js file
       * Please use babel-loader
       * Docs: https://github.com/babel/babel-loader
       */
      {
        test: /\.js$/,
        exclude: /node_modules/,
        use: {
          loader: 'babel-loader',
          options: {
            // Enabled cache for faster recompilation
            cacheDirectory: true,
            /**
             * Here we tell babel where to find babel config file
             * Note that we can also put our babel config (presets and plugins) here
             * Since Babel 7, using .babelrc filename not recommended
             * Here we are using the new recommended filename
             * using babel.config.js filename
             * Docs: https://babeljs.io/docs/en/config-files
             */
            configFile: path.resolve(ROOT_DIRECTORY, 'config/babel.config.js'),
          },
        },
      },
    ],
  },
};
Now, let's create a new file named babel.config.js inside our config folder to put our babel configuration:
// config/babel.config.js
module.exports = {
  presets: [
    [
      '@babel/preset-env',
      {
        useBuiltIns: 'usage',
        corejs: 3,
        debug: false,
      },
    ],
  ],
};
Fuhhhh, that's a lot. What's next? Our HTML entry point (of course, because this is a web project). Let's add some content to our HTML template:
<!-- src/index.html -->
<!DOCTYPE html>
<html lang="en">
  <head>
    <meta charset="UTF-8" />
    <meta name="viewport" content="width=device-width, initial-scale=1.0" />
    <meta http-equiv="X-UA-Compatible" content="ie=edge" />

    <title>Webpack Boilerplate</title>
  </head>
  <body>
    <h1>Webpack boilerplate</h1>
  </body>
</html>
You probably ask, how to include our HTML template to our bundle?
Well, to do that, we are going to use html-webpack-plugin. This plugin will include our HTML and inject our JS bundle automatically into our HTML using the <script> tag.
Let's install it:
# If you're using yarn
yarn add --dev html-webpack-plugin

# If you're using npm
npm install --save-dev html-webpack-plugin
And now use it on our webpack config:
// config/webpack.config.js
const HtmlWebpackPlugin = require('html-webpack-plugin');
module.exports = {
  // other configs
  module: {},
  plugins: [    new HtmlWebpackPlugin({      template: path.resolve(ROOT_DIRECTORY, 'src/index.html'),      filename: 'index.html',    }),  ],};
Let's also update our scripts to start development server using webpack-dev-server:
// package.json
{
  // other items
  "scripts": {
    // Before (You can delete this compile scripts)
    "compile": "webpack",
    // After
    "start": "webpack-dev-server --open --config=config/webpack.config.js"  }
}
Now, we can start our development server using yarn start or npm run start, then it will automatically open our browser and then navigate to http://localhost:3000.
You probably wondering, can we use async await in our code? Of course, we can.
Let's update our index.js to use async await:
// src/index.js
function greet(name) {
  return new Promise((resolve, reject) => {
    setTimeout(() => {
      resolve(`Hello ${name}!`);
    }, 1000);
  });
}

// I know this is dumb
// Just for demo purpose
async function print() {
  const response = await greet('John Doe');
  console.log(response);
}

print();
Oh no, when we start our development server again, we get these error:

If you read the error carefully, webpack cannot find module regenerator-runtime/runtime, it's because to use async await, we need 2 packages, @babel/runtime and @babel/plugin-transform-runtime.
Let's add it to our project:
# If you're using yarn
yarn add @babel/runtime
yarn add --dev @babel/plugin-transform-runtime

# If you're using npm
npm install --save @babel/runtime
npm install --save-dev @babel/plugin-transform-runtime
Once it done, let's use it to our Babel config file:
// config/babel.config.js
module.exports = {
  presets: [
    [
      '@babel/preset-env',
      {
        useBuiltIns: 'usage',
        corejs: 3,
        debug: false,
      },
    ],
  ],
  plugins: ['@babel/plugin-transform-runtime'],};
If we start our development server again, now the error is gone, and we can start using async await on our project. Yeayyy!
What about other features like optional-chaining and nullish-coalescing-operator? Well, we can install the plugins and use them on our project the same as above.
# If you're using yarn
yarn add --dev @babel/plugin-proposal-optional-chaining @babel/plugin-proposal-nullish-coalescing-operator

# If you're using npm
npm install --save-dev @babel/plugin-proposal-optional-chaining @babel/plugin-proposal-nullish-coalescing-operator
Note: Since Babel 7.8.0, optional-chaining, and nullish-coalescing-operator enabled by default, so if our Babel version is 7.8.0 and above, we don't have to install and add the plugin manually.
Then don't forget to add it to our Babel config:
// config/babel.config.js
module.exports = {
  presets: [],
  plugins: [
    '@babel/plugin-transform-runtime',
    '@babel/plugin-proposal-optional-chaining',    '@babel/plugin-proposal-nullish-coalescing-operator',  ],
};
What if we want to use dynamic import, can we do that? Yes, we can! Since Babel version 7.4.0, dynamic import support enabled by default, so we don't have to install @babel/plugin-proposal-dynamic-import, but if our Babel version below that version, we have to add that plugin manually to our project.
Let's split our greet function into separate files, then we will use dynamic import in our index.js file:
// src/greet.js
export function greet(name) {
  return new Promise((resolve, reject) => {
    setTimeout(() => {
      resolve(`Hello ${name}!`);
    }, 1000);
  });
}

// src/index.js
async function print() {
  // Here we are using dynamic import
  const { greet } = await import('./greet');
  const response = await greet('John Doe');
  console.log(response);
}

print();
Now, I'm sure we've covered most of the JavaScript parts. Let's get to the next part, Stylesheet.
Stylesheet (CSS, SASS and CSS Modules)
In order to use CSS in our project, the step is the same as how we configure JavaScripts. First, we need a loader, then use the loader in our webpack configuration. There are 2 packages needed so we can use CSS in our project, style-loader and css-loader.
Let's add it:
# If you're using yarn
yarn add --dev style-loader css-loader

# If you're using npm
npm install --save-dev style-loader css-loader
Once it done, let's use it on our config file:
// config/webpack.config.js
module.exports = {
  // other configs
  module: {
    rules: [
      // other module rules
      {
        test: /\.css$/,
        use: [
          /**
           * style-loader will inject CSS into the DOM with <style> tag
           */
          'style-loader',
          {
            loader: 'css-loader',
            options: {
              // Enable url functions handling in css
              url: true,
              // Enables @import at-rules handling
              import: true,
              // Disable css modules
              modules: false,
            },
          },
        ],
      },
    ],
  },
};
Now, we can start using CSS in our project. For example, let's create CSS file inside our src folder named main.css:
/* src/main.css */
html {
  box-sizing: border-box;
  font-size: 62.5%; /* Set font to 1rem = 10px */
}

*,
*::before,
*::after {
  box-sizing: inherit;
}

body {
  font-size: 1.6rem;
  background-color: lightseagreen;
  margin: 0;
  padding: 0;
}
And don't forget to import the style:
// src/index.js
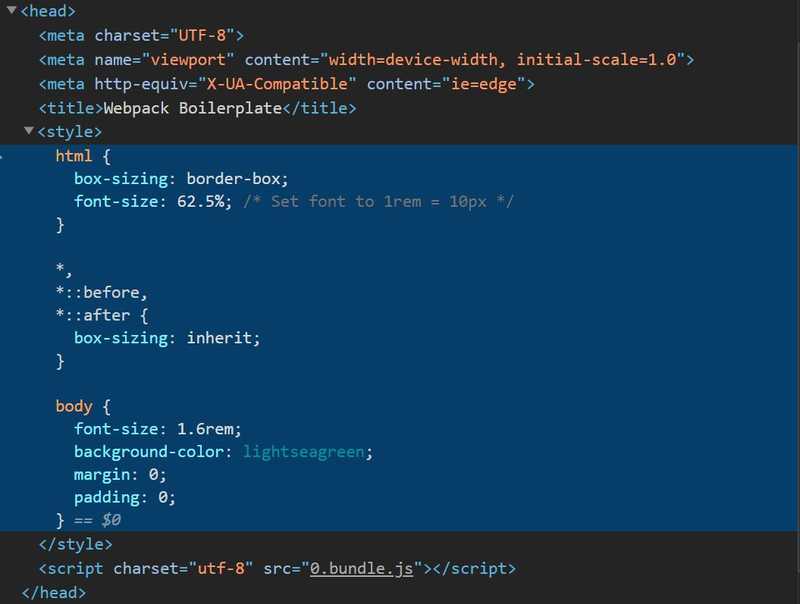
import './main.css';Now, if we take a look at our compiled HTML in the browser, it will attach the <style> tag in our DOM, and it might look like below:
This still limited to CSS file only though, if we want to use CSS Pre-Processor like SASS, we also need to set it up.
Let's install all required packages in order to use SASS in our project:
# If you're using yarn
yarn add --dev node-sass sass-loader resolve-url-loader

# If you're using npm
npm install --save-dev node-sass sass-loader resolve-url-loader
// config/webpack.config.js
module.exports = {
// other configs
module: {
rules: [
// other module rules
{
test: /\.css$/,
use: [
'style-loader',
{
loader: 'css-loader',
options: {
url: true,
import: true,
modules: false,
},
},
],
},
{ test: /\.(sass|scss)$/, use: [ 'style-loader', { loader: 'css-loader', options: { url: true, import: true, modules: false, }, }, // resolve-url-loader is needed for sass to correctly resolve relative url path 'resolve-url-loader', { loader: 'sass-loader', options: { // sourceMap required by resolve-url-loader sourceMap: true, }, }, ], }, ],
},
};And done! We can start using SASS on our project.
You probably already know, CSS use case not limited to that, there are other alternatives such as CSS Modules. So, what is it? CSS Modules is a CSS file in which all class names and animation names are scoped locally by default. But how? Well, with the help of webpack we can enable CSS Modules on our project.
Did you notice that we disabled modules options on css-loader above? What happens if we enabled it? Well, of course, it will process our CSS into CSS Modules.
Let's setup CSS Modules on our project:
// config/webpack.config.js
module.exports = {
  // other configs
  module: {
    rules: [
      // other module rules
      {
        test: /\.css$/,
        exclude: /\.module\.css$/,        use: [
          'style-loader',
          {
            loader: 'css-loader',
            options: {
              url: true,
              import: true,
              modules: false,
            },
          },
        ],
      },
      {        test: /\.module\.css$/,        use: [          'style-loader',          {            loader: 'css-loader',            options: {              url: true,              import: true,              modules: {                // Convention name of generated CSS Modules classname                localIdentName: '[name]__[local]--[contenthash:8]',              },            },          },        ],      },      {
        test: /\.(sass|scss)$/,
        exclude: /\.module\.(sass|scss)$/,        use: [
          'style-loader',
          {
            loader: 'css-loader',
            options: {
              url: true,
              import: true,
              modules: false,
            },
          },
          'resolve-url-loader',
          {
            loader: 'sass-loader',
            options: {
              sourceMap: true,
            },
          },
        ],
      },
      {        test: /\.module\.(sass|scss)$/,        use: [          'style-loader',          {            loader: 'css-loader',            options: {              url: true,              import: true,              modules: {                // Convention name of generated CSS Modules classname                localIdentName: '[name]__[local]--[contenthash:8]',              },            },          },          'resolve-url-loader',          {            loader: 'sass-loader',            options: {              sourceMap: true,            },          },        ],      },    ],
  },
};
Now, every time we want to use CSS Modules, we need to create a file with the convention name something.module.css or something.module.scss and import it in our JavaScript file.
Let's try create CSS Modules files named index.module.css and fill with the code below:
/* src/index.module.css */
.h1 {
  color: orangered;
  font-size: 5rem;
}
And don't forget to import it on our JS file:
// src/index.js
import './main.css'; // -> webpack still process this as normal CSS
import styles from './index.module.css'; // -> This will get processed as CSS Modules
const h1 = document.querySelector('h1');h1.classList.add(styles.h1);
Now, it will add class to our H1 element, and it will look like this:

CSS Future Syntax and Autoprefix
Wouldn't it be fun when we write CSS, we can use CSS future syntax today just like how we develop our web app with the latest JavaScript features, regardless of current browser supports. For example, maybe you already know that CSS hasn't been able to use nested rules for a long time (unless you're using CSS Pre-Processor like SASS), but, if we take a look at cssdb or here, W3C plans to add the nesting rules feature to CSS, but still on stage 1 though, which mean we can't use it today.
Introduce postcss-preset-env. What is it? Basically, it’s like Babel for CSS. It allows us to write CSS future syntax and transpiles that code to CSS which is widely supported by most browsers. Now, with help of postcss-preset-env, we can start using nesting rules in CSS today!
postcss-preset-env also enabled autoprefix by default, so as we writing our CSS, we don't have to worry about manually add vendor prefix. Awesome right?
Now, let's add it to our project:
# If you're using yarn
yarn add --dev postcss-loader postcss-preset-env

# If you're using npm
npm install --save-dev postcss-loader postcss-preset-env
Also, let's update our webpack config:
// config/webpack.config.js
module.exports = {
  // other configs
  module: {
    rules: [
      // other module rules
      {
        test: /\.css$/,
        exclude: /\.module\.css$/,
        use: [
          'style-loader',
          {
            loader: 'css-loader',
            options: {
              url: true,
              import: true,
              modules: false,
            },
          },
          {            loader: 'postcss-loader',            options: {              ident: 'postcss',              /**               * Note: You can also put your postcss config here               * Instead of make a new file just like we do here               * Docs: https://github.com/postcss/postcss-loader#config               */              config: {                /**                 * Tell postcss-loader where to find our postcss config                 */                path: path.resolve(ROOT_DIRECTORY, 'config'),              },            },          },        ],
      },
      {
        test: /\.module\.css$/,
        use: [
          'style-loader',
          {
            loader: 'css-loader',
            options: {
              url: true,
              import: true,
              modules: {
                localIdentName: '[name]__[local]--[contenthash:8]',
              },
            },
          },
          {            loader: 'postcss-loader',            options: {              ident: 'postcss',              config: {                path: path.resolve(ROOT_DIRECTORY, 'config'),              },            },          },        ],
      },
      {
        test: /\.(sass|scss)$/,
        exclude: /\.module\.(sass|scss)$/,
        use: [
          'style-loader',
          {
            loader: 'css-loader',
            options: {
              url: true,
              import: true,
              modules: false,
            },
          },
          {            loader: 'postcss-loader',            options: {              ident: 'postcss',              config: {                path: path.resolve(ROOT_DIRECTORY, 'config'),              },            },          },          'resolve-url-loader',
          {
            loader: 'sass-loader',
            options: {
              sourceMap: true,
            },
          },
        ],
      },
      {
        test: /\.module\.(sass|scss)$/,
        use: [
          'style-loader',
          {
            loader: 'css-loader',
            options: {
              url: true,
              import: true,
              modules: {
                localIdentName: '[name]__[local]--[contenthash:8]',
              },
            },
          },
          {            loader: 'postcss-loader',            options: {              ident: 'postcss',              config: {                path: path.resolve(ROOT_DIRECTORY, 'config'),              },            },          },          'resolve-url-loader',
          {
            loader: 'sass-loader',
            options: {
              sourceMap: true,
            },
          },
        ],
      },
    ],
  },
};
We have already told postcss-loader where to look for the config file, let's create a postcss config file in our config folder named postcss.config.js:
Note: For convention name of PostCSS config file, you can read more in here.
// config/postcss.config.js
module.exports = {
  plugins: [
    /**
     * Docs: https://github.com/csstools/postcss-preset-env
     */
    require('postcss-preset-env')({
      // Enabled Stage 2 features and add polyfill if necessary
      stage: 2,
      /**
       * Enabled this list of features no matter what stage are
       * You can see the list of all features id below:
       * https://github.com/csstools/postcss-preset-env/blob/master/src/lib/plugins-by-id.js#L36
       */
      features: {
        // Enabled nesting rules features
        'nesting-rules': true,
        // Enbaled prefers-color-scheme features
        // To detect dark/light mode
        'prefers-color-scheme-query': true,
      },
      // This will get passed to autoprefixer
      autoprefixer: {
        // This will add flexbox prefixes only final and IE 10 versions of specification
        flexbox: 'no-2009',
        // This will enable autoprefixer grid translations and include autoplacement support
        grid: 'autoplace',
      },
    }),
  ],
};
Now, as we write our CSS, we can start using CSS future syntax today and it also will automatically add vendor prefixes for us!
There are known issues with Flexbox, you can read more here. Because Flexbox now supports most browsers, we will most likely use Flexbox in our project. As we develop our project using Flexbox, we didn't want something isn't working as we'd expect because of the Flexbox issues. Luckily, there are fixes for that using postcss-flexbugs-fixes.
Let's add that fixes to our project:
# If you're using yarn
yarn add --dev postcss-flexbugs-fixes

# If you're using npm
npm install --save-dev postcss-flexbugs-fixes
Then, let's add it on our postcss config:
// config/postcss.config.js
module.exports = {
  plugins: [
    /**
     * Fixes flexbox issues
     * Docs: https://github.com/luisrudge/postcss-flexbugs-fixes
     */
    require('postcss-flexbugs-fixes'),    require('postcss-preset-env')({
      stage: 2,
      features: {
        'nesting-rules': true,
        'prefers-color-scheme-query': true,
      },
      autoprefixer: {
        flexbox: 'no-2009',
        grid: 'autoplace',
      },
    }),
  ],
};
Image and other files
Our webpack project, not only limited to JavaScript and CSS. It also can handle much more than that. For example, webpack can also handle assets like images and fonts.
But, how? The idea is the same with how we configure and use JavaScript. Let's include images and fonts support to our project:
yarn add --dev url-loader file-loader

npm install --save-dev url-loader file-loader
// config/webpack.config.js
module.exports = {
// other configs
module: {
rules: [
// other module rules
{
test: /\.(png|jpe?g|gif|svg|bmp|webp)$/i,
use: [
{
loader: 'url-loader',
options: {
name: '[name].[contenthash:8].[ext]',
// If the size is below 4kb
// It will inlined using Base64 URIs
limit: 4096,
// The output folder our images
// In this case we pick a name assets (or you can change to other name like static)
// In this case the output will be "/build/assets"
outputPath: 'assets',
},
},
],
},
],
},
};By now, we can start using images in our JavaScript and CSS files.
Let's also add for fonts!
// config/webpack.config.js
module.exports = {
  // other configs
  module: {
    rules: [
      // other module rules
      {
        test: /\.(woff|woff2|eot|ttf|otf)$/i,
        use: [
          {
            loader: 'file-loader',
            options: {
              name: '[name].[contenthash:8].[ext]',
              outputPath: 'assets',
            },
          },
        ],
      },
    ],
  },
};
Production
To build our project for production, we need another config and scripts, because what we used previously is only for development. You might ask, why? Perhaps, you're already aware, that what we did previously, just so we can using webpack for development, or in other words, just make it works so we can start developing our project without optimizing our code (JS, CSS) and assets.
For production, it slightly different. The goal is to serve all our code and assets to the users with the minified bundles and optimized assets to improve load time. For example, we have to minify our JS and CSS, split our bundles, then compress it to make the size smaller, and many other things. If you interested more in optimizing your site, you can read more on web.dev.
Because there is some differences between development and production, it is recommend to separate our webpack config, one for development and one for production. Now, because our webpack.config.js is so far only for development, let's update the name to webpack.dev.js. Let's also create a new webpack config file named webpack.prod.js for production inside our config folder.
Now, our project structure would look like below:
|-- config
    |-- babel.config.js
    |-- postcss.config.js
    |-- webpack.config.js --> webpack.dev.js
    |-- webpack.prod.js
|-- src
    |-- greet.js
    |-- index.html
    |-- index.js
    |-- index.module.css
    |-- main.css
|-- package.json
Because we just changed the filename of our webpack config, let's update our scripts in our package.json, then, also add a script for a production build.
// package.json
{
  "scripts": {
    "start": "webpack-dev-server --open --config=config/webpack.dev.js",
    "build": "webpack --config=config/webpack.prod.js"
  }
}
Now, what should we do with our webpack.prod.js? Let's fill in the same as our webpack.dev.js. After we copy-paste, update the mode to production, then delete some options related to development only like devServer. We'll also disable generate source maps in production, so we'll delete devtool options too. But, If you wish to generate source maps, you can keep devtool options or update the value like source-map. You can read more here about devtool.
Now our webpack.prod.js would look like below:
// config/webpack.prod.js
const path = require('path');

const HtmlWebpackPlugin = require('html-webpack-plugin');

const ROOT_DIRECTORY = process.cwd();

module.exports = {
  mode: 'production',
  entry: {
    main: path.resolve(ROOT_DIRECTORY, 'src/index.js'),
  },
  output: {
    path: path.resolve(ROOT_DIRECTORY, 'build'),
    filename: '[name].bundle.js',
    chunkFilename: '[name].chunk.js',
  },
  module: {
    rules: [
      {
        test: /\.js$/,
        exclude: /node_modules/,
        use: {
          loader: 'babel-loader',
          options: {
            cacheDirectory: true,
            configFile: path.resolve(ROOT_DIRECTORY, 'config/babel.config.js'),
          },
        },
      },
      {
        test: /\.css$/,
        exclude: /\.module\.css$/,
        use: [
          'style-loader',
          {
            loader: 'css-loader',
            options: {
              url: true,
              import: true,
              modules: false,
            },
          },
          {
            loader: 'postcss-loader',
            options: {
              ident: 'postcss',
              config: {
                path: path.resolve(ROOT_DIRECTORY, 'config'),
              },
            },
          },
        ],
      },
      {
        test: /\.module\.css$/,
        use: [
          'style-loader',
          {
            loader: 'css-loader',
            options: {
              url: true,
              import: true,
              modules: {
                localIdentName: '[name]__[local]--[contenthash:8]',
              },
            },
          },
          {
            loader: 'postcss-loader',
            options: {
              ident: 'postcss',
              config: {
                path: path.resolve(ROOT_DIRECTORY, 'config'),
              },
            },
          },
        ],
      },
      {
        test: /\.(sass|scss)$/,
        exclude: /\.module\.(sass|scss)$/,
        use: [
          'style-loader',
          {
            loader: 'css-loader',
            options: {
              url: true,
              import: true,
              modules: false,
            },
          },
          {
            loader: 'postcss-loader',
            options: {
              ident: 'postcss',
              config: {
                path: path.resolve(ROOT_DIRECTORY, 'config'),
              },
            },
          },
          'resolve-url-loader',
          {
            loader: 'sass-loader',
            options: {
              sourceMap: true,
            },
          },
        ],
      },
      {
        test: /\.module\.(sass|scss)$/,
        use: [
          'style-loader',
          {
            loader: 'css-loader',
            options: {
              url: true,
              import: true,
              modules: {
                localIdentName: '[name]__[local]--[contenthash:8]',
              },
            },
          },
          {
            loader: 'postcss-loader',
            options: {
              ident: 'postcss',
              config: {
                path: path.resolve(ROOT_DIRECTORY, 'config'),
              },
            },
          },
          'resolve-url-loader',
          {
            loader: 'sass-loader',
            options: {
              sourceMap: true,
            },
          },
        ],
      },
      {
        test: /\.(png|jpe?g|gif|svg|bmp)$/i,
        use: [
          {
            loader: 'url-loader',
            options: {
              name: '[name].[contenthash:8].[ext]',
              limit: 4096,
              outputPath: 'assets',
            },
          },
        ],
      },
      {
        test: /\.(woff|woff2|eot|ttf|otf)$/i,
        use: [
          {
            loader: 'file-loader',
            options: {
              name: '[name].[contenthash:8].[ext]',
              outputPath: 'assets',
            },
          },
        ],
      },
    ],
  },
  plugins: [
    new HtmlWebpackPlugin({
      template: path.resolve(ROOT_DIRECTORY, 'src/index.html'),
      filename: 'index.html',
    }),
  ],
};
By now, we can start using our build scripts to generate our app for production and webpack will put them in the /build folder for us.
Cleanup every build
In general, it's good practice to clean our /build folder before each build, so that only used files will be generated. Webpack have a plugin specifically for that, it's clean-webpack-plugin. Let's add the plugin to our project:
# If you're using yarn
yarn add --dev clean-webpack-plugin

# If you're using npm
npm install --save-dev clean-webpack-plugin
Then also update our webpack config in development and production:
// config/webpack.dev.js
// config/webpack.prod.js
const path = require('path');

const HtmlWebpackPlugin = require('html-webpack-plugin');
const { CleanWebpackPlugin } = require('clean-webpack-plugin');
module.exports = {
  // other configs
  module: {},
  plugins: [
    new CleanWebpackPlugin(),    new HtmlWebpackPlugin({
      template: path.resolve(ROOT_DIRECTORY, 'src/index.html'),
      filename: 'index.html',
    }),
  ],
};
For a better caching, let's use a hash on our output filename and chunkFilename for production:
// config/webpack.prod.js
module.exports = {
  // other configs
  output: {
    path: path.resolve(ROOT_DIRECTORY, 'build'),
    filename: '[name].[contenthash:8].bundle.js',    chunkFilename: '[name].[contenthash:8].chunk.js',  },
  module: {},
};
Extract CSS into file
You realize that every time we build for production, there's no CSS file, it's because we still using style-loader. For production is a little bit different, we want to extract it into a file. In this case, we're gonna use MiniCssExtractPlugin to extracts our CSS into separate file.
Now, let's install it and update our webpack production config to use MiniCssExtractPlugin instead of style-loader:
# If you're using yarn
yarn add --dev mini-css-extract-plugin

# If you're using npm
npm install --save-dev mini-css-extract-plugin
// config/webpack.prod.js
const MiniCssExtractPlugin = require('mini-css-extract-plugin');
module.exports = {
// other configs
module: {
rules: [
// other rules config
{
test: /\.css$/,
exclude: /\.module\.css$/,
use: [
MiniCssExtractPlugin.loader, {
loader: 'css-loader',
options: {
url: true,
import: true,
modules: false,
},
},
{
loader: 'postcss-loader',
options: {
ident: 'postcss',
config: {
path: path.resolve(ROOT_DIRECTORY, 'config'),
},
},
},
],
},
{
test: /\.module\.css$/,
use: [
MiniCssExtractPlugin.loader, {
loader: 'css-loader',
options: {
url: true,
import: true,
modules: {
localIdentName: '[name]__[local]--[contenthash:8]',
},
},
},
{
loader: 'postcss-loader',
options: {
ident: 'postcss',
config: {
path: path.resolve(ROOT_DIRECTORY, 'config'),
},
},
},
],
},
{
test: /\.(sass|scss)$/,
exclude: /\.module\.(sass|scss)$/,
use: [
MiniCssExtractPlugin.loader, {
loader: 'css-loader',
options: {
url: true,
import: true,
modules: false,
},
},
{
loader: 'postcss-loader',
options: {
ident: 'postcss',
config: {
path: path.resolve(ROOT_DIRECTORY, 'config'),
},
},
},
'resolve-url-loader',
{
loader: 'sass-loader',
options: {
sourceMap: true,
},
},
],
},
{
test: /\.module\.(sass|scss)$/,
use: [
MiniCssExtractPlugin.loader, {
loader: 'css-loader',
options: {
url: true,
import: true,
modules: {
localIdentName: '[name]__[local]--[contenthash:8]',
},
},
},
{
loader: 'postcss-loader',
options: {
ident: 'postcss',
config: {
path: path.resolve(ROOT_DIRECTORY, 'config'),
},
},
},
'resolve-url-loader',
{
loader: 'sass-loader',
options: {
sourceMap: true,
},
},
],
},
],
},
plugins: [
// other plugins
new MiniCssExtractPlugin({ filename: '[name].[contenthash:8].bundle.css', chunkFilename: '[name].[contenthash:8].chunk.css', }), ],
};Now, every time we run scripts yarn build or npm run build, it will also create a CSS file for us.
Minify HTML
If we take a look at our generated HTML in the /build folder, it doesn't get minified. To minify our HTML, we gonna use html-webpack-plugin minify options, which is by default using html-minifier-terser.
Let's add the minify option to our html-webpack-plugin for production:
// config/webpack.prod.js
module.exports = {
  // other configs
  module: {},
  plugins: [
    new CleanWebpackPlugin(),
    new HtmlWebpackPlugin({
      template: path.resolve(ROOT_DIRECTORY, 'src/index.html'),
      filename: 'index.html',
      /**
       * You can see all the option here:
       * https://github.com/DanielRuf/html-minifier-terser
       */
      minify: {        collapseWhitespace: true,        removeComments: true,        removeRedundantAttributes: true,        removeStyleLinkTypeAttributes: true,        useShortDoctype: true,        minifyJS: true,        minifyCSS: true,        minifyURLs: true,      },    }),
  ],
};
Minify JS and Code Splitting
Now, let's take a look at our JS file. You noticed that our JS file already gets minified. But, we do nothing with webpack to optimize our code. How come? Well, it's because by default, when webpack runs on production mode, it will automatically minimize our JS code using TerserPlugin.
Webpack also comes with an optimization option to split our bundle. For example, we want to split runtime code and third-party libraries into a separate chunk as they are less likely to change than our local source code.
Let's split our bundle into separate chunk to make our main bundle smaller:
// webpack.prod.js
module.exports = {
  // other configs
  module: {},
  plugins: [],
  optimization: {
    /**
     * Minimize the bundle using the TerserPlugin (by default)
     */
    minimize: true,
    /**
     * Keep the runtime chunk separated to enable long term caching
     * Reference: https://twitter.com/wSokra/status/969679223278505985
     */
    runtimeChunk: {
      name: (entrypoint) => `runtime-${entrypoint.name}`,
    },
    /**
     * Split third-party libraries into vendors chunk to enable long term caching
     * Docs: https://webpack.js.org/plugins/split-chunks-plugin/
     * Reference: https://medium.com/webpack/webpack-4-code-splitting-chunk-graph-and-the-splitchunks-optimization-be739a861366
     * Reference: https://twitter.com/wSokra/status/969633336732905474
     */
    splitChunks: {
      chunks: 'all',
    },
  },
};
Now every time we build, it will separate and generate runtime and vendor chunk from our main bundle code.
Minify JS with custom options
We already know, that webpack will automatically minimize our JS using Terser, but, what if we want to customize the options that get passed to terser? To do that, all we have to do is to add terser-webpack-plugin to our project:
# If you're using yarn
yarn add --dev terser-webpack-plugin

# If you're using npm
npm install --save-dev terser-webpack-plugin
// config/webpack.prod.js
const TerserPlugin = require('terser-webpack-plugin');
module.exports = {
// other configs
module: {},
plugins: [],
optimization: {
minimize: true,
minimizer: [
/**
* Minify our JS code using Terser with custom options
* Docs: https://github.com/webpack-contrib/terser-webpack-plugin
* Default Options: https://github.com/terser/terser
*/
new TerserPlugin({
terserOptions: {
parse: {
ecma: 8,
},
compress: {
comparisons: false,
ecma: 5,
inline: 2,
},
mangle: {
// Work around the Safari 10 loop iterator bug
// https://bugs.webkit.org/show_bug.cgi?id=171041
safari10: true,
},
output: {
// Turned on because emoji and regex is not minified properly using default
ascii_only: true,
// Remove all comment
comments: false,
ecma: 5,
},
},
}),
],
},
};Minify CSS
We already saw how to minimize out HTML and JS. What about our CSS? So far, if we take a look at our extracted CSS, our CSS still not minimized. To minimize our CSS, there are 2 alternatives to achieve it. First, directly add cssnano to our PostCSS config to minify our CSS. Second, using webpack plugin, optimize-css-assets-webpack-plugin, which is under the hood using cssnano too.
You might ask, what's the difference and which one is better? To be honest, I don't really know much about it. I can't say much in this subject, but, if you're someone who knows about this, could you explain it to me or maybe give some references that I can read so I'll update this blog post.
For now, let's put that aside, in this guide we'll be using optimize-css-assets-webpack-plugin. Let's add it to our project:
# If you're using yarn
yarn add --dev optimize-css-assets-webpack-plugin postcss-safe-parser

# If you're using npm
npm install --save-dev optimize-css-assets-webpack-plugin postcss-safe-parser
// config/webpack.prod.js
const OptimizeCSSAssetsPlugin = require('optimize-css-assets-webpack-plugin');
const safePostCssParser = require('postcss-safe-parser');
module.exports = {
// other configs
module: {},
plugins: [],
optimization: {
minimize: true,
minimizer: [
// other minimizer plugin
/**
* Minify our CSS
* Docs: https://github.com/NMFR/optimize-css-assets-webpack-plugin
*/
new OptimizeCSSAssetsPlugin({
cssProcessorOptions: {
parser: safePostCssParser,
map: false,
},
cssProcessorPluginOptions: {
/**
* You can see all the preset option here:
* https://github.com/cssnano/cssnano/tree/master/packages/cssnano-preset-default
*/
preset: [
'default',
{
discardComments: {
removeAll: true,
},
minifyFontValues: {
removeQuotes: false,
},
},
],
},
}),
],
},
};Compression
One important thing before delivering our assets (HTML, CSS, JS and etc) to users, we need to compress it first. By compressing our assets alone, we can significantly reduce the total size of our assets, which leads to smaller network payloads when users visit our site or in other words, the smaller the assets, the faster to download. The faster download means a faster page load.
Some said we don't need to do compression by ourselves. Many hosting platforms, CDNs, and Web Servers like Nginx or Apache could provide compression dynamically as they get requested by the browser for us. But, in this guide, we will do compression while we build our project for production.
To compress our assets, we need compression-webpack-plugin. By default, this plugin only generates gzip compression. But, since Node.js v11.7.0 support brotli compression, this plugin could also generate brotli for us. Let's add it to our project:
# If you're using yarn
yarn add --dev compression-webpack-plugin

# If you're using npm
npm install --save-dev compression-webpack-plugin
Then don't forget to use it in our webpack production config to generate gzip and brotli compression:
// config/webpack.prod.js
const CompressionPlugin = require('compression-webpack-plugin');

module.exports = {
  // other configs
  module: {},
  plugins: [
    // other plugins
    new CompressionPlugin({
      algorithm: 'gzip',
      compressionOptions: { level: 9 },
      filename: '[path].gz[query]',
      minRatio: 0.8,
      test: /\.(js|css|html|svg)$/,
    }),
    new CompressionPlugin({
      algorithm: 'brotliCompress',
      compressionOptions: { level: 11 },
      filename: '[path].br[query]',
      minRatio: 0.8,
      test: /\.(js|css|html|svg)$/,
    }),
  ],
  optimization: {},
};
As a side note, if you're running Node.js below v11.7.0, you need brotli-webpack-plugin to generate brotli compression.
# If you're using yarn
yarn add --dev brotli-webpack-plugin

# If you're using npm
npm install --save-dev brotli-webpack-plugin
// config/webpack.prod.js
const CompressionPlugin = require('compression-webpack-plugin');
const BrotliPlugin = require('brotli-webpack-plugin');
module.exports = {
// other configs
module: {},
plugins: [
// other plugins
new CompressionPlugin({
algorithm: 'gzip',
compressionOptions: { level: 9 },
filename: '[path].gz[query]',
minRatio: 0.8,
test: /\.(js|css|html|svg)$/,
}),
new BrotliPlugin({ asset: '[path].br[query]', minRatio: 0.8, test: /\.(js|css|html|svg)$/, }), ],
optimization: {},
};Now, all we have to do is to configure our server to serve brotli compression with fallback to gzip if the users browser doesn't support brotli compression. But, because our focus is only on webpack, we will just leave it as it is.
Well, that's a really long guide, and now, we reach the end of the guide. I hope you find this guide useful and can start using it for your development. It might take a little time, but learning how this tool works will pay off.
Was this article helpful? Share it on:


Personal notes by Fin Mavis.
As a reminder to my future self while learning.